
How To Make A Photo Collage Of Your Kids In Under 10 Minutes!
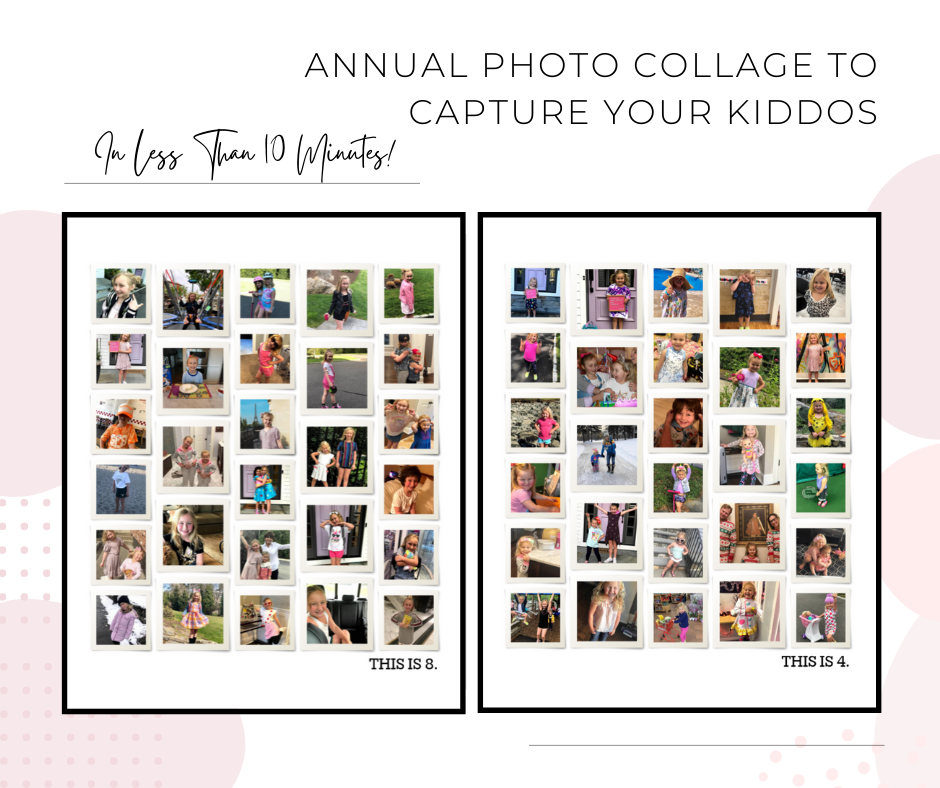
These are the photo collages I made to sum up Alexa at age 8 and Goldie at age 4 using Google Photos and Shutterfly in 10 minutes each!
I got WAYYYY behind on my annual family yearbook project this year- and even let the photo collages I do for each of my girls fall by the wayside. Homeschool and all the other new aspects of quarantine life made the days fly by in a frenzy, and I just couldn’t get my act together to sit down and sort photos.
Yesterday, I had had ENOUGH. It sounds silly, but I hear it from you guys all the time too so I know I am not alone in this: The constant hum of anxiety in my brain caused by digital photo clutter and was getting too loud. So I went into my office and shut the door for 10 minutes and made 2 amazing (if I do say so myself) photo collages to capture my girls 4th and 8th years of life using this easy template.
How To Make a Photo Collage in 10 Minutes Using Google Photos and Shutterfly:
First off, make sure you have a Google Photos account, and sync up all your phone photos to it. I know there are a million photo apps out there, including iPhoto (or whatever it is called these days, I can’t keep track!) - I have tried- and use- many of them. But for me, I have found Google Photos to be the easiest for searching and sharing- and now, it also works easily with my go-to photo print and photo book site, Shutterfly.)
Okay- here is my process:
1- Create a new album in Google Photos, I call mine SELECTS Alexa Age 8 and SELECTS Goldie Age 4. Consistent album titles help me to stay sane year after year.
2- Search by month, scroll through and select 3-4 photos per month to add to each album. I start with January 2019 (since that is their birthday month, and hence the start of said year), and end with December 2019.
3- Select THIS collage option in Shutterfly (there are a ton of options so feel free to browse around, but for me, this is the best one- it is clean and simple and the photo template sizes tend to work with my photos and don’t require a ton of resizing, because nobody got time for that, amiright?!). I size it to 11 x 14, but you can do whatever size works best for your walls.
4- Click on the “Add Photos” icon, select Google Photos as the source, then just load the entire “SELECTS” album into the project.
5- Drag and drop photos from the tray along bottom of screen onto the collage in no particular order, until it is all filled!
6- Edit the text along the bottle right as you wish- I size the font at 32, always.
DONE! Just add it to your cart, and purchase. It seriously took me less than a half an hour to do the collages for each of my girls, and I feel SOOOOOO relieved to know that there will be printed images, highlighting all the various moments from the past year, in a keepsake collage arriving at my door next week.