
DIY Dress Up Rack: Corral The Costumes!
Perhaps more than any other item in my house, this is the thing of which I am most proud.

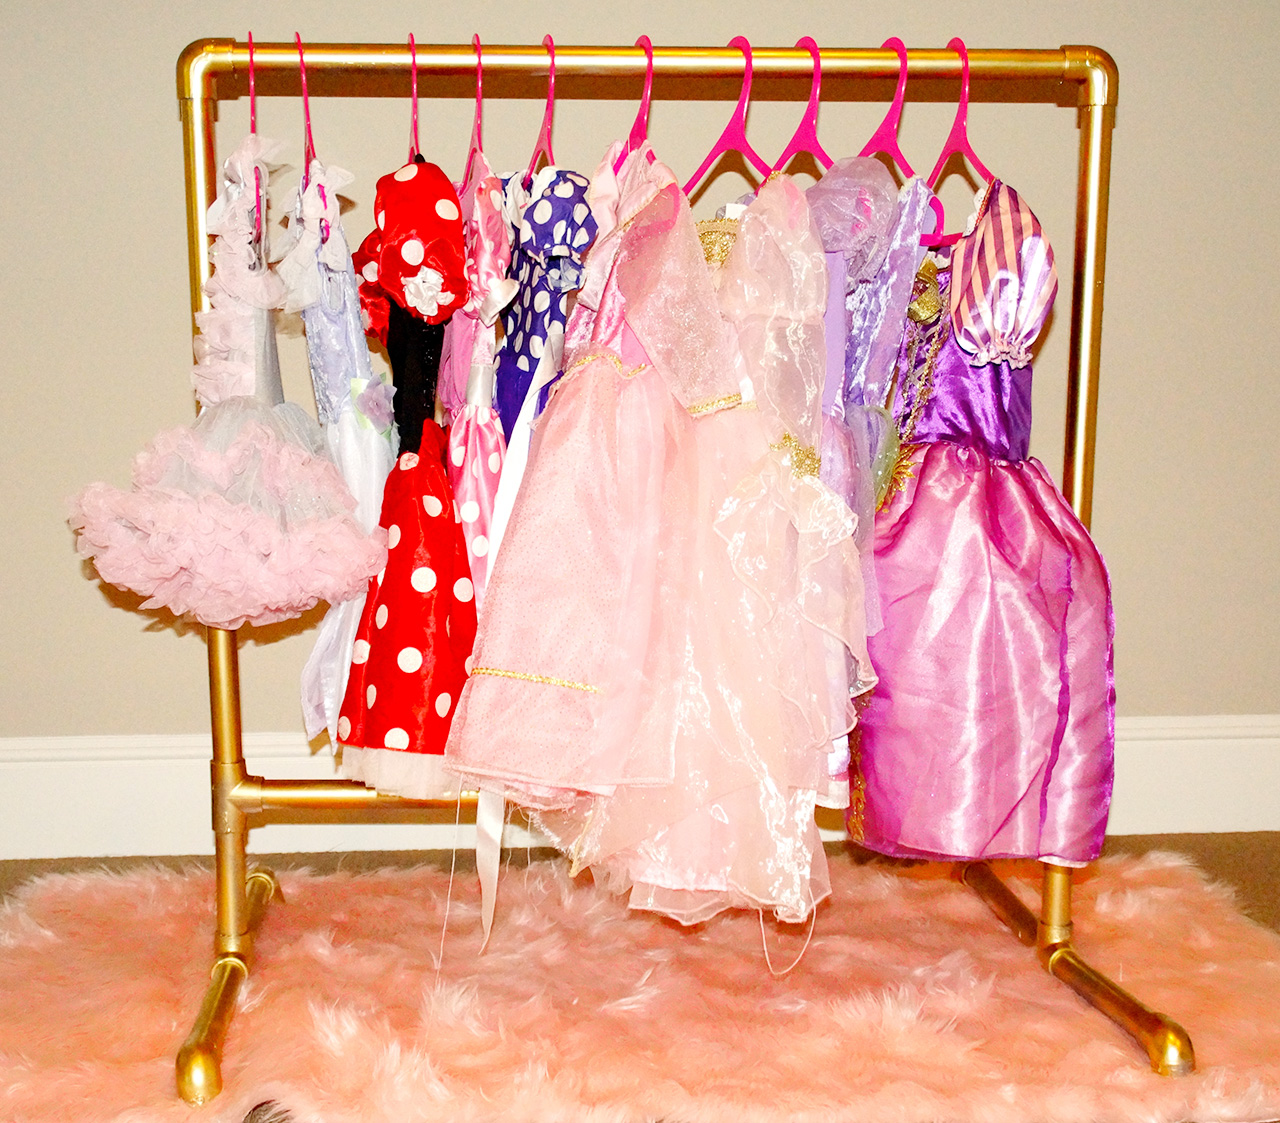
My daughter LOVES to play dress up. We have amassed a collection of frilly princess tutus that would put a drag queen to shame. Hours on hours were spent looking for a cute way to store/display them- only to end with me frustrated (SO expensive! SO cheesy looking!) and frantically stuffing said tutus into a trunk upon hearing our afternoon playdate pull into the driveway and wanting to make a good first impressions (Look at our impeccably organized playroom! Impressed? Great. Just don't open that trunk...)
One morning, I was aimlessly playing around on Pinterest (in an effort to cure my Candy Crush habit, I have substituted Pinterest searching as my "10 minutes til I need to take Alexa to school and I need some sort of stimulation" activity), when I came across THIS. A seemingly simple step-by-step guide to making my own clothing rack. I bee-lined right from drop-off to Home Depot, bought supplies and restocked my gold spray paint stash. An hour later, I had created what, in my not-so-humble opinion, is nothing short of a mom masterpiece.
A little insider scoop from my personal experience getting all crafty: (here is the full step-by step that I used as reference)
-Home Depot will cut the 1" PVC pipe for you- it takes like 5 minutes, so bring the list of the sizes you need so you can hand it off to them, and while they cut, you can seek out the other items you need. A cheat sheet: Two 36" lengths, two 30" lengths, four 12" lengths, two 6" lengths.
-Double check to make sure that your joints (Six 90-degree elbow joints, four tee connectors) have openings designed for 1" PVC pipe, and double check that you picked up the ones you intended. I am not a seasoned Home Depot goer, so I blindly trusted that the items in the bins were in fact the items written on the tags below the bins. As the nice lady who rang up my sale pointed out, double-checking the serial numbers on the sides is crucial- doing so saved me a trip or ten back to the store for replacements.
-Take the time and lay the structure out on the ground and test all the joints to make sure they fit before starting in with the PVC glue. They will fit, and this step will feel unnecessary, but if you get frazzled mid-assembly (glue starts to spill, the phone rings, etc.), having it already laid out will prevent careless mistakes.
-Before spray painting, use a primer. This will help the spray paint hold better, and with the hangers constantly being pulled at by impatient little princess-in-waiting hands, you want that extra level of insurance that the finish will remain shiny and fabulous.
While waiting for the gilted gorgeousness to dry, I ran out and picked up pink hangers and a pink shaggy rug.
Now we have a costume corner in the playroom- and I have major bragging rights, since THE ENTIRE THING WAS CREATED FOR WELL UNDER $100! (**brushes pretend dirt off her shoulder...**)